Cab Kit Installation
- Trim is integral with the panel system making the installation quick, easy, and seamless.
- No templates or separate hardware are required for mounting clips or panel attachment mechanisms to the car shell.
- Disassembly: If for some reason a panel is damaged, the installation process can easily be reversed to removed the damaged component and replace it since all the components are installed utilizing simple mechanical fasteners.
Typical base to bottom panel interface
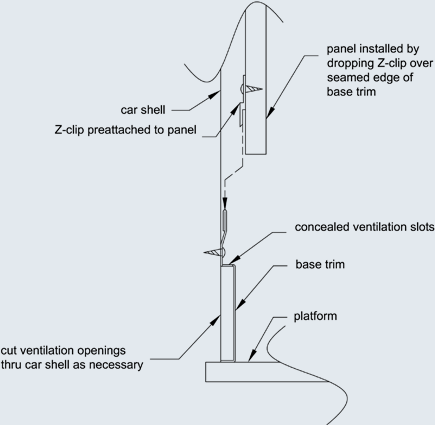
Panel-base
Precut base trim is secured to car shell with included screws providing a ready receptor to allow the panel simply to slip onto the base trim interfacing securely with the preinstalled z-clips on the panel.
Ventilation
Indirect ventilation openings in the top of the base trim grant concealed ventilation ports while allowing for the preservation of existing cab ventilation openings without requiring custom trim components. If there are no current ventilation openings in an existing car shell, the base trim affords a ready area close to the floor for cutting or drilling adequate ventilation openings in a totally concealed space.
Typical panel to wall interface
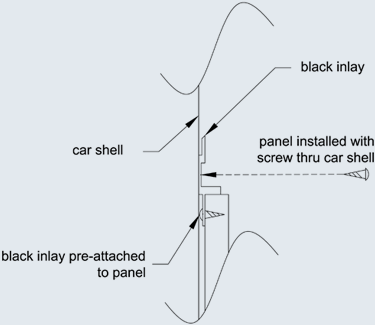
Panel-wall
Once a panel has been dropped into place on the base trim or an adjacent panel, it is secured to the car shell with provided screws through our unique inlay trim.
Typical panel to panel interface
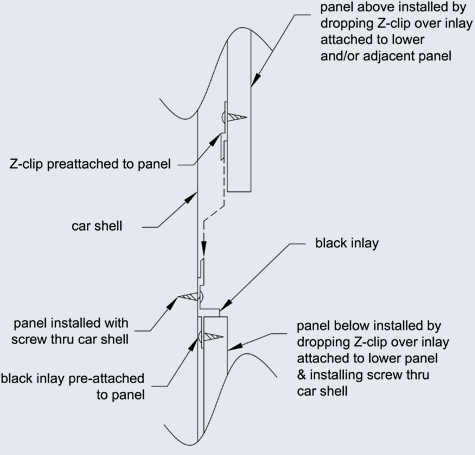
Panel-panel
Our unique inlay trim component provides accurate reveal spacing between panels and a quick, easy, & secure mechanical connection of the panels to the car shell. One panel easily interfaces with an adjacent panel by a simple slip connection. A pre-attached z-clip on one panel mates to our unique inlay trim piece that was pre-installed on the adjacent panel and then the panel assembly attached to the car shell.
Typical panel to top trim interface
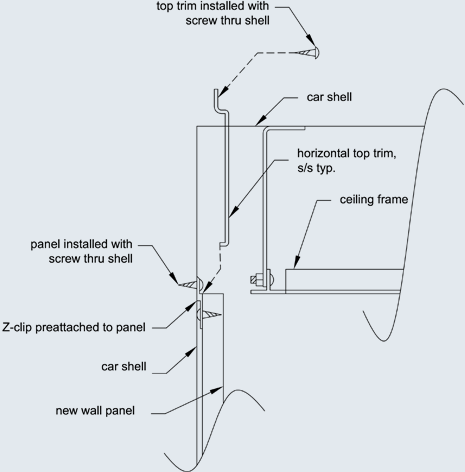
Panel-top trim
After all the panels are secured to the car shell, a top trim component drops over the screw heads along the top edge of the topmost panel. The top trim is mechanically fastened to the car shell with provided screws above the ceiling line leaving a clean, neat look with totally concealed mechanical fasteners.